Painting your home can completely change its look and feel, giving it a fresh, clean, and vibrant atmosphere. Proper preparation is essential for achieving a smooth, professional finish that lasts for years. Homeowners often underestimate the time and effort required to prep surfaces correctly, which can lead to peeling, uneven coverage, or wasted materials. Hiring professionals ensures that surfaces are handled properly and that the job is done efficiently. Florida painters are trained to inspect walls, ceilings, and trim, providing advice on tools, materials, and techniques. They make sure your home is ready for painting, saving time, effort, and unnecessary frustration during the project.
Step 1: Clear and Protect Your Space
Before starting any painting project, remove furniture, decorations, and personal items from the rooms being painted. Cover floors, rugs, and carpets with durable drop cloths to protect against paint splatters. Painter’s tape should be applied to window frames, door edges, and trim to create clean lines. Proper protection ensures your belongings stay safe and your floors remain clean. Even small items on shelves or counters should be temporarily relocated. Removing outlet covers, light fixtures, and switch plates prevents accidental paint stains. Creating clear pathways allows painters to work efficiently without interruptions or hazards. Planning and organizing your space before painting helps the process go smoothly and saves cleanup time afterward.
Step 2: Repair and Prepare Surfaces
Cracks, holes, or dents in walls can ruin the final appearance of any paint job. Patch damaged areas with spackle or appropriate fillers and sand them smooth for a uniform surface. Loose or peeling paint should be scraped away to ensure the new coat adheres properly. Priming the walls before painting improves coverage and extends the lifespan of your paint. Inspect ceilings, corners, and edges for signs of water damage or mold that may need treatment. Clean surfaces thoroughly to remove dirt, grease, or dust that can prevent proper adhesion. Proper surface preparation reduces rework, ensures even coverage, and makes your home look polished.
Step 3: Choose the Right Paint and Tools
Selecting the correct type of paint is crucial for achieving professional-looking results. Flat paint is excellent for hiding imperfections, while semi-gloss or satin finishes work best in kitchens and bathrooms. High-quality brushes, rollers, and trays make paint application smoother and faster. Testing a small area helps verify the color choice before committing to the entire room. Ensure you have enough paint to cover all surfaces without frequent interruptions. Using primers or undercoats enhances topcoat vibrancy and durability. Adequate ventilation prevents harmful fumes from accumulating indoors. Having all tools and materials ready beforehand saves time and ensures consistent results.
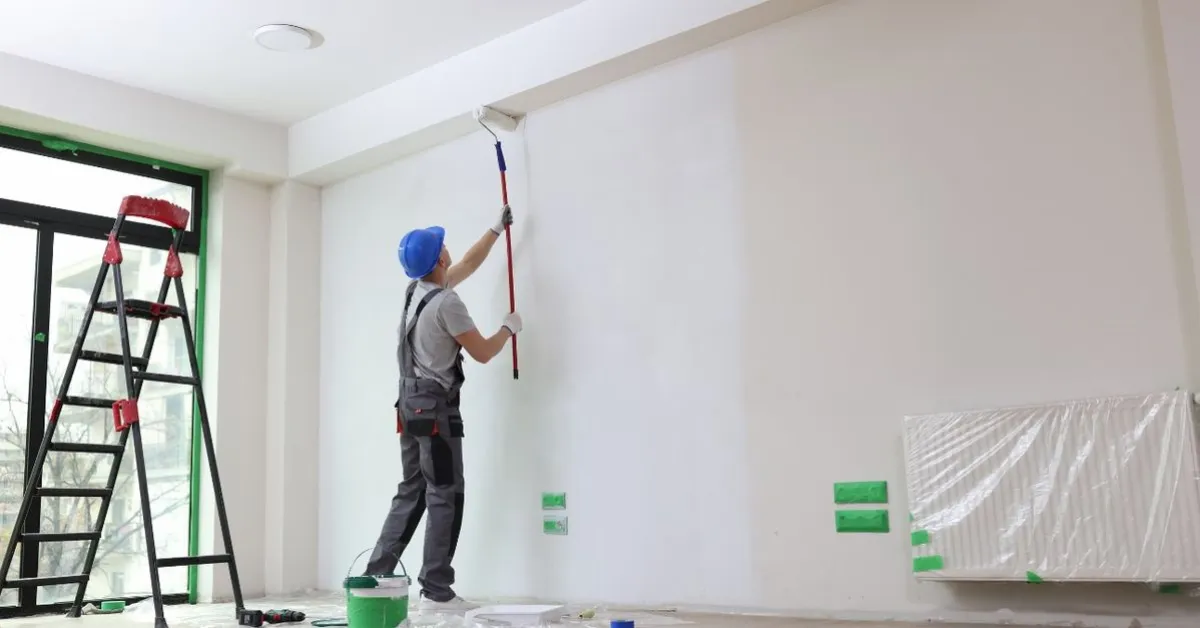
Step 4: Organize and Plan Painting Schedule
Plan which areas or rooms to paint first based on size, lighting, or household use. Smaller rooms are easier to complete before larger spaces. Allow sufficient drying time between coats to avoid streaks and uneven finishes. Protect children, pets, and household items from wet paint areas. Begin with ceilings first, then move to walls, trim, doors, and cabinets. Use ladders safely and avoid overstretching to reach higher areas. Organizing paint containers prevents spills and confusion about colors. Professionals recommend painting during daylight hours for accurate color perception. Scheduling efficiently ensures a smooth process, reducing stress while producing high-quality results.
Step 5: Clean and Inspect After Painting
Once painting is finished, remove painter’s tape slowly to prevent peeling freshly painted surfaces. Clean brushes, rollers, and trays immediately to maintain them for future projects. Inspect walls, trim, and ceilings for missed spots or uneven areas and touch up carefully. Remove floor coverings cautiously to avoid spreading paint onto carpets or hard surfaces. Dispose of leftover paint responsibly, following local guidelines. Reposition furniture and decorations only after paint has dried completely. Regularly inspecting painted walls and trimming helps maintain their appearance over time. Following these steps ensures a polished finish that enhances your home’s beauty and longevity.
FAQs About Preparing Your Home for Painting
Q1. How long should I prepare my home before painting?
Preparation usually takes a few hours to a full day, depending.
Q2. Should I move all furniture or just fragile items?
Move all valuable or delicate items to prevent accidental paint damage.
Q3. Is it necessary to prime walls before painting?
Yes, primer improves paint adhesion and ensures even color coverage.
Q4. Can I paint over cracks without patching them first?
No, repairing cracks prevents uneven surfaces and peeling paint later.
Q5. How do I protect floors and carpets properly?
Use drop cloths secured with painter’s tape for full surface coverage.
Conclusion
Preparing your home properly is the most important step for a successful paint job. Clearing furniture, repairing walls, and using quality paint ensures long-lasting results. Proper protection keeps your belongings safe and reduces stress during the process. Scheduling and planning your work efficiently guarantees a polished finish. Professional advice helps homeowners achieve excellent results without errors. Following these steps increases satisfaction and ensures your home looks fresh and beautiful. Take time to prepare, and your painting project will result in vibrant, clean, and impressive surfaces that last for years. Get a Free Estimate from Florida Superior Painting to start your project today.