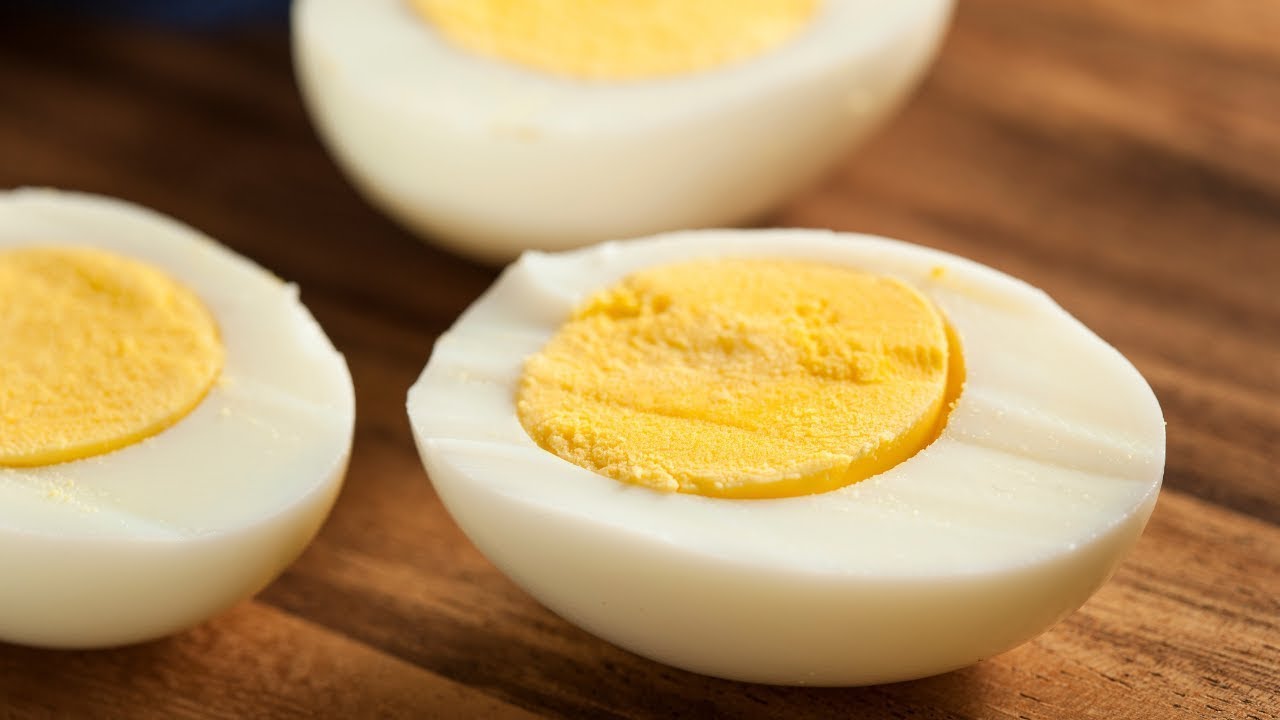
Eggs may appear to be very straightforward, however, grey, ringed, rubbery, and disappointing eggs have become quite common. Most people tend to boil the eggs for too long or leave them hot for a long time, and the result is far from the smooth and bright yolk they were expecting.
The taste also worsens when the texture is off, which is very frustrating especially when the remedy is so simple.This article will teach you how to avoid hardboiled eggs from overcooking with simple steps that guarantee success in every attempt.
You will figure out how heat impacts eggs, the role of timing, and how to rapidly cool the eggs for an excellent finish. After a thorough comprehension of these steps, you will be completely free of dry, powdery yolks forever. Let’s delve into it.
Why Hardboiled Eggs Overcook
The process of overcooking occurs when eggs remain in hot water for excessive periods. The eggs continue to cook because the water maintains its heat even after the heat source shuts down.
What continues the cooking process?
- Residual heat in the water
- The hot shell holding warmth
- Slow cooling after boiling
The three factors you control will determine whether the texture maintains its softness and the color maintains its purity.
The Science Behind Perfect Hard Boiled Eggs
Hard boiled eggs respond to heat in a very predictable way. The whites are set at a lower temperature than the yolks. This small difference is why timing matters so much. As the heat climbs, the proteins tighten. If they tighten too far, they turn rubbery.
Temperature Stages
- 60–70°C: whites begin to firm
- 70–80°C: yolks start to set
- Above 80°C: texture becomes chalky
Stopping the temperature climb is the key to avoiding overcooking. This is why a cold-water shock makes such a big difference.
The Best Method to Stop Hardboiled Eggs From Overcooking
1. Start with cold water
The eggs should be placed in a pan for cooking which requires them to be spread out in a single layer and then cold water should be added until it reaches a depth of 2 to 3 centimeters. The use of cold water enables eggs to heat up at the same rate.
2. Bring to a gentle boil
The pan should be heated on medium heat until small bubbles begin to appear at its outer edges. The gradual temperature increase prevents shell damage while maintaining the smooth appearance of the egg whites.
3. Turn off the heat at the right moment
The moment the water starts to boil with a steady unchanging rhythm you should turn off the heat and cover the pan with a lid. The steam that remains inside the container cooks the eggs at a low temperature without exceeding the cooking temperature.
4. Set a timer for the perfect cooking time
You should use a timer because it helps you establish the correct time to stop cooking. The soft-set yolk requires 7 minutes to cook. The firm yolk requires 9 minutes to reach its fully cooked state. The hard yolk requires 11 minutes to reach its fully cooked state.
5. Use an ice bath at once
The bowl should be filled with cold water mixed with a large amount of ice. The moment the timer ends the eggs should be removed from the pan and placed directly into the ice bath. The fast cooling process stops cooking within seconds while it preserves the bright yellow color of the yolks.
6. Peel under running water
The eggs should be peeled after they reach a temperature suitable for handling which occurs when they contact cold water. The water creates a space between the shell and membrane which enables easier peeling.
How to Tell When Hardboiled Eggs Are Ready
You cannot check the inside of an egg while it cooks, but there are simple ways to know you have reached the right point.
Quick signs:
- Timing matches your desired texture
- The eggs feel firm when tapped
- The shells do not rattle loosely
Still, timing is the most reliable method.
Common Mistakes That Lead to Overcooked Eggs
Many people follow habits that almost guarantee overcooked eggs. Knowing the mistakes makes them easy to avoid.
- Boiling on high heat for the full time: A roaring boil cooks too fast and makes the eggs tough.
- Leaving eggs in hot water after cooking: Even five extra minutes can push the yolks into chalky territory.
- Skipping the ice bath: Without rapid cooling, the eggs keep cooking internally.
- Not using a timer: Guessing often leads to overdone results.
Cooling Techniques That Prevent Overcooking
The process of cooling food needs the same level of importance as the process of cooking food.
The Ice Bath Method
- A bowl needs filling with ice together with cold water.
- The cooked eggs need to be added to the bowl immediately.
- The bath requires a 5 to 10 minute period of time.
- Peel the eggs after they reach complete coldness.
Cold Running Water
The cook needs to place the pan under cold running water for 2 to 3 minutes until the eggs reach complete cooling. The method becomes effective when ice is unavailable because it prevents eggs from becoming overcooked.
Why Cooling Works
The process of rapid cooling prevents the sulphur-iron reaction, which produces the grey ring that forms around the yolk. The process maintains the whites in their soft state, which prevents them from becoming rubbery.
Different Cooking Methods That Prevent Overcooking
1. Steaming
Steaming warms the eggs gently and makes overcooking less likely.
How to do it:
- Add 2cm of water to a pan
- Place a steamer basket inside
- Add eggs
- Steam for 12–14 minutes
- Move to ice bath
This gives tender whites and bright yolks.
2. Using an Air Fryer
Air fryers give consistent results because the heat is controlled and timed.
Steps:
- Preheat to 130°C
- Place eggs inside
- Cook for 12–15 minutes
- Cool at once in ice water
Great if you prefer a hands-off method.
3. Using a Sous-Vide
This method is almost foolproof because the temperature never rises above the set point.
Basic instructions:
- Set water bath to 75°C
- Cook eggs for 13–14 minutes
- Transfer to ice bath
It gives a smooth texture that is hard to achieve with boiling.
How to Store Hardboiled Eggs Without Overcooking the Texture
People tend to overlook storage claims. However, it substantially impacts the ultimate outcome.
Storage tips:
- Keep eggs in the fridge once cooled
- Leave shells on until ready to eat
- Store in a covered container
- Use within 5–7 days
The yolk reaches a crumbly texture after eggs dry out which resembles the texture produced through overcooking.
Conclusion
Cooks face three problems with hardboiled eggs because the process should be easy to make. The most common overcooking issues can be solved through three methods which involve controlling heat and monitoring cooking time and using ice baths for quick egg cooling.
The process requires two small steps which result in smooth egg whites and bright egg yolks. You should try different cooking techniques between steaming and air frying to determine which one works best in your kitchen. The ability to control temperature and determine when to end the cooking process allows you to make perfect hard boiled eggs.
FAQs
What causes hardboiled eggs to develop a grey ring around their yolk
A grey ring forms when the egg stays hot for too long. The sulphur present in the whites reacts with the iron found in the yolk. Fast cooling of the eggs through an ice bath method stops this specific reaction from occurring.
What duration of boiling is necessary to prevent egg overcooking
You should bring the water to a boil before turning off the heat to let the eggs sit for 7 to 11 minutes which depends on your desired yolk firmness. The process of cooling needs to begin immediately after that.
Do older eggs peel better?
The answer is yes because older eggs have higher pH levels which allow the shell to separate from the membrane through improved shell detachment. This leads to smoother peeling.
Which temperature should I use to boil my eggs between cold and room temperature
The best method requires using cold water because it protects against cracking while achieving even cooking results which prevents overcooking.